Daedalian key locations in Hogwarts Legacy
The Daedalian key locations are the sixteen flying keys you hunt through Hogwarts Castle to finish a side quest and earn a House Token in Hogwarts Legacy. The quest starts when you speak with Nellie Oggspire near the Transfiguration Classroom, and it places one key per floor of the castle, each one tied to a House Cabinet that has to be unlocked before you can move to the next target. The key is the trigger, the cabinet is the goal, and the fastest completion is the one that respects the way Hogwarts is wired vertically rather than the one that walks a flat line on the map.
This page is written for a player who already has access to the castle, has picked up the quest from Nellie Oggspire, and wants every cabinet location in a single reference along with the practical details the field guide leaves off-screen. The order below follows the floor-by-floor progression used by the developers, but the cabinets can be opened in any sequence. What changes is how much backtracking you accept, and how often you have to step back through a Floo Flame.
How the Daedalian Keys quest actually works
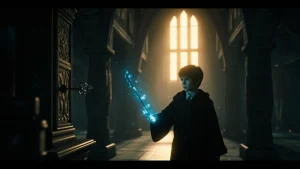
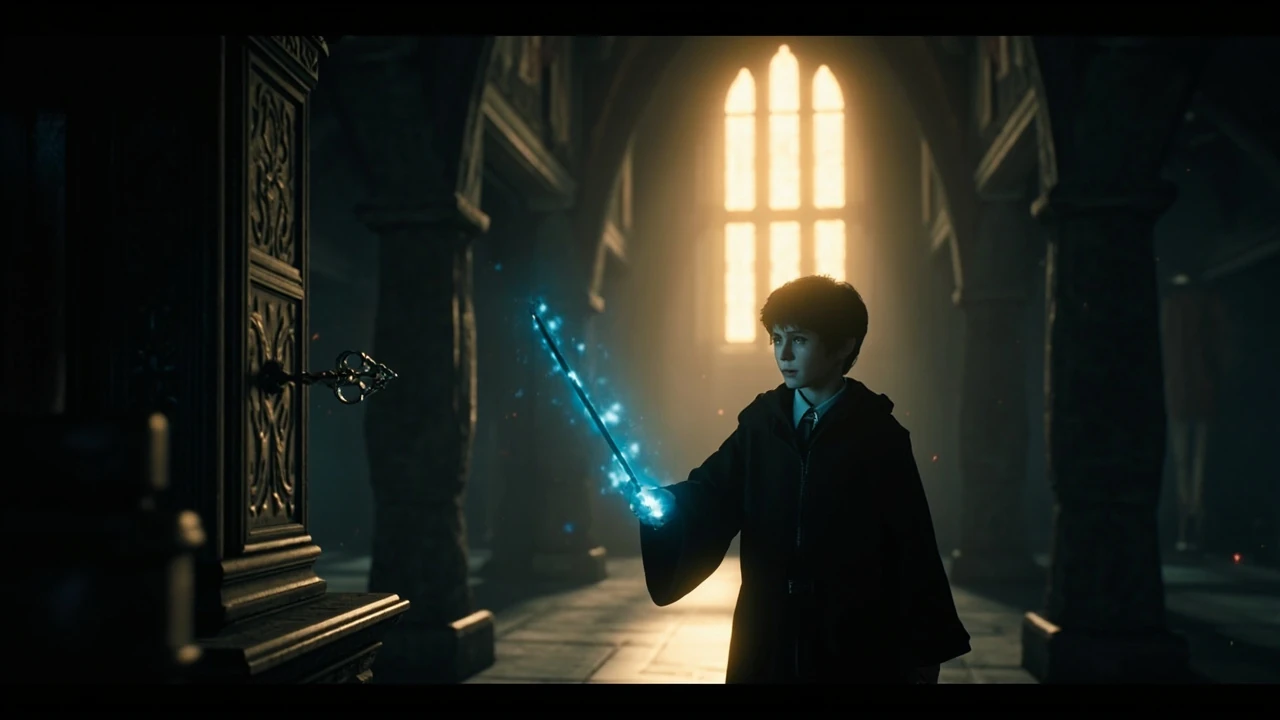
When you fast travel to the Transfiguration Classroom Floo Flame and speak to Nellie Oggspire, she explains that the Daedalian Keys have returned and tells you to chase one to the Astronomy Tower. Walk to the top of the tower, and a key spawns in the air and begins drifting back down through the building. The key behaves like a slow, steering-aware companion: it threads through doorways, hovers near stair landings, and only opens a House Cabinet when you bring it close enough. After that first cabinet is opened, the remaining fifteen keys seed themselves around the castle, one per floor, with each key bound to a cabinet on the same floor it spawned on.
Two mechanics drive the whole quest. First, the key leads rather than spawns in place, so you can fail to catch it if you hit it with a spell, knock it off course, or lose line of sight in a tight corridor. Second, each cabinet you open gives a small cosmetic reward and contributes to the House Token set, which is the long-form goal of the side quest. Because the keys are tied to physical space rather than to a checklist on screen, navigation is the bottleneck, not combat. The quest applies to every version of the game, including the PC, PS4, PS5, and Xbox Series X/S releases, as well as the Switch version that arrived in November 2023.
What you need before you start
The quest is open from the moment you unlock the castle grounds, but a few tools turn a slow run into a clean one. You do not need to be at a high level to complete it, and none of the cabinets are guarded by enemies that scale to your character.
- Transfiguration Classroom Floo Flame unlocked, because the quest giver stands beside it and it is the natural pin for the first leg of the run.
- A broom or a controlled summoning spell, since several keys sit high above the main corridor or in atria that span multiple floors.
- Disillusionment or a stealth posture, which is helpful in restricted wings but not required, because the quest does not trigger hostile encounters on its own.
- The Map Room and the Room of Requirement unlocked, since both act as fast-travel hubs near most of the relevant corridors.
Open the field guide map and pin the Transfiguration Classroom before you speak to Nellie, because the first key is the only one that needs a guided chase from the top of the Astronomy Tower. After that, every cabinet is reachable from a Floo Flame, and the challenge is sequencing rather than exploration.
Quest structure and what each cabinet gives you
Every opened House Cabinet awards a random piece of cosmetic gear drawn from a small pool: a robe, a hat, a gloves-and-scarf set, or a small trinket slot item. The exact item is randomized, and there is no guarantee that a specific cabinet will give a specific piece of gear. What is fixed is the count: sixteen keys, sixteen cabinets, one House Token when the final cabinet is opened. The House Token counts toward the Collections tab in the field guide and unlocks a thematic display in the Room of Requirement once a full set is gathered.
| Quest phase | Player action | What happens | Reward |
|---|---|---|---|
| Meet Nellie Oggspire | Talk to Nellie near Transfiguration Classroom | Quest starts, first key spawns in the Astronomy Tower | None yet |
| First key chase | Follow the flying key down the tower into a classroom | Key opens a House Cabinet | First cosmetic item |
| Floor-by-floor sweep | Hunt remaining keys on each castle floor | Each key unlocks one cabinet | One cosmetic item per cabinet |
| Final cabinet | Open the sixteenth cabinet | Quest completes, House Token awarded | House Token and final cosmetic |
The reward is cosmetic, so the quest is optional for combat progression, but it is one of the few ways to round out a character’s wardrobe without paying real currency, and the House Token display becomes a useful personal benchmark for completion-minded players who want a visible sign of how much of the castle they have already mapped.
All sixteen Daedalian key locations by floor
The list below uses the floor names shown in the field guide map. Each entry pairs the cabinet’s general area with the kind of space you are looking for, so you can route the run from a single Floo Flame. The order is the in-game canonical order used by the side quest, which means it is also the order the field guide uses when it sorts objectives by floor.
Lower floors of the castle
The lower floors contain the densest cluster of cabinets, and they benefit from a single sweep that moves down a stairwell and back up via a parallel corridor. The cabinets in this section are easy to reach on foot and do not require a broom, which makes them a good warm-up for the harder upper floors.
- Defence Against the Dark Arts Tower, near the staircase that wraps around the central column. The cabinet sits on a half-landing and is visible from two directions, which is why first-time players often walk past it twice before they notice.
- Transfiguration Courtyard, on the outside wall facing the central fountain. The key floats low and circles the courtyard once before settling, so the cleanest approach is to stand near the fountain and wait for it to drop to cabinet height.
- Library Annex, beside a reading alcove on the upper level. The cabinet is the dark oak one with brass fittings, and it is the only cabinet in this section that is easy to confuse with a decorative prop if you are walking past the shelves at speed.
- Charms Classroom, mounted to the wall behind the teacher’s lectern, which is the only cabinet in the lower section that is partly blocked by furniture until you move the camera around the room.
Mid-level floors
The mid-level floors are the part of the castle where Floo Flames are close together, so this is the section where you save the most time by chaining fast travel rather than walking. The cabinets here are the ones you can chain into a single ten-minute sweep if you sequence the pins correctly.
- Potions Classroom, attached to the wall beside the dungeon entrance arch, at the height of the lower torch brackets.
- Great Hall, on the side wall nearest the staff table. The key descends from the rafters and requires either a broom or the Summoner’s Court minigame timing to intercept on the way down.
- Viaduct Courtyard, on the wall opposite the bridge that leads to the Library. The cabinet is at adult head height and easy to miss if you walk toward the bridge first, because the key approaches from the side rather than head-on.
- Faculty Tower, on the landing just below the Headmaster’s office stairs. This is the only mid-level cabinet that needs a vertical climb rather than a horizontal walk, and it is the cabinet that benefits most from a pinned Floo Flame inside the tower.
Astronomy Wing and upper floors
The upper floors include the area where the first key is found, which makes them a good place to start a second pass if you want to verify that you have not missed any cabinet in the lower part of the castle. The first key in the quest is the one that appears at the top of the Astronomy Tower, so the first cabinet you ever open sits on the same floor as the quest’s opening scene.
- Astronomy Tower, at the base of the staircase. The first key opens this cabinet and acts as a visual anchor for the rest of the run, because the key’s flight path down the tower is the only one the quest forces on you.
- Map Chamber, on the wall across from the entrance, partially hidden by the central map table. Walk around the table once and the cabinet is on the far side at chest height.
- Hospital Wing, on the wall behind the bed at the far end of the ward, which is also the bed closest to the window.
- Bell Tower Corridor, on the wall beside the door that leads to the Bell Tower courtyard, and the key hovers near the bell rope for a moment before drifting toward it.
Restricted access and tower wings
The last four cabinets are the easiest to miss because they sit in wings of the castle that players tend to visit only during story content. If you have already done the main quest, they are the most likely to be the ones that broke your previous run, and they are also the ones that other guides tend to list last because the wings are gated.
- Grand Staircase mid-level, on the wall above the trophy room entrance, which is the section of the staircase that overlooks the lower hall.
- Ravenclaw Tower, on the wall of the tower’s central chamber, visible only after the door puzzle is solved and the chamber opens for the first time.
- Slytherin Dungeons, on the wall of the duelling arena, which is accessible only after the story quest that opens the dungeon has been completed.
- Room of Requirement, on the wall just inside the entrance. The final cabinet is the one that closes the quest, and it sits on the side of the room where the House Token display eventually appears.
Cabinet-to-cabinet navigation
The fastest route is not the same as the canonical order. Below is a comparison of two reasonable routes for a single sweep, so you can pick the one that matches whether you prefer fast travel or continuous walking. The times below are rough averages for a player who already knows where each cabinet is, not a first-pass estimate.
| Route style | Sequence | Floo Flames used | Approximate time | Main trade-off |
|---|---|---|---|---|
| Vertical descent | Top-to-bottom sweep from Astronomy Tower to Slytherin Dungeons | Four | About 45 minutes of continuous movement with fewer loads | Requires a broom for high keys; good for completionists who like long runs |
| Hub-and-spoke | Fast travel to each floor’s central Floo Flame, then walk to its cabinet | Twelve or more | About 30 minutes split across short legs with more loading screens | Easy to drop a cabinet if you forget a pin; good for short play sessions |
Both routes are valid and they both end with the same House Token. The vertical descent favours players who like to see the architecture of the castle as they move, while the hub-and-spoke route favours players who want to split the work into fifteen-minute blocks and resume from the same pin every time. If you are short on time, the hub-and-spoke route also makes it easier to stop after a single cabinet, because the only state you need to preserve is the pinned Floo Flame and the open field guide.
How to handle each flying key
The For additional context, keys follow a consistent pattern: they spawn, hover for about a second, then drift toward their cabinet at a slow walking pace. The behavioural differences between keys are minor, but the space they move through changes how you approach them, and the most common cause of a failed chase is treating a high-ceiling key the same way you treat a corridor key.
Keys in corridors
Keys that drift along a corridor are the easiest to handle. Walk behind them, keep the cabinet in view, and let the key lead. Casting any spell near the key is unnecessary and risks knocking it off course, which is the single most common reason a key despawns before reaching its cabinet. The key is also the only object in the chase that is interactive, so there is no reason to swing your wand at the cabinet or at the air around the key.
Keys in atria and the Great Hall
Keys that spawn in tall open spaces tend to hover high for a moment before descending. The fastest solution is a broom, because chasing them on foot means climbing stairs to a position that the key has already left. Once the key descends to the cabinet, dismount and follow on foot, because the cabinet interaction only triggers when you are on the ground. In the Great Hall specifically, the key tends to drop from the central chandelier, so a broom is almost always faster than the staircase at the south end.
Keys in courtyards
Courtyard keys are exposed to wind and to longer sight lines, but the wind is purely cosmetic and does not change the key’s path. Walk at a steady pace and avoid sprinting past the cabinet, because the trigger for the cabinet is proximity rather than collision. The key will slow down as it approaches, which is your cue to stop, let it land, and open the cabinet. If you have a companion following you, dismiss them before the chase, because companion dialogue can break the key’s hover state and reset the spawn.
Keys in restricted wings
The wings tied to the Hogwarts houses are gated by story progress. If a key refuses to spawn or a wing is closed, return to the main quest and complete the access mission before continuing. The side quest will wait, and the cabinets do not despawn, so you do not lose anything by leaving and coming back later. The Ravenclaw and Slytherin cabinets are the most common ones to be locked on a first pass, because the puzzles that open their wings are tied to late-game story beats.
Common failure modes and how to recover
Most failed runs are not caused by a bug. They are caused by a small number of repeatable mistakes, and each has a clear recovery path that does not require restarting the quest. If you have ever opened the field guide and wondered why a key will not appear, the answer is almost always in this list.
- The key despawned before reaching the cabinet. This usually means a spell hit it. Open the field guide, fast travel to the nearest Floo Flame, and the key will respawn after a short delay, usually under a minute.
- The cabinet is not visible from the route. The map pin may be on a different floor than the cabinet. Use the room name in the field guide to confirm which floor you are on, then move to the matching staircase.
- The quest marker is gone. The quest is still active; only the marker has decayed. Reopen the quest in the field guide to refresh the marker and re-pin the nearest Floo Flame.
- The wing is locked. The story gate has not opened yet. Continue the main quest or a house-specific quest until the door unlocks, then return to the cabinet.
- The cabinet will not open. The key is hovering above the cabinet rather than beside it. Walk around the cabinet once to give the trigger a fresh proximity check, and the cabinet will open.
- The key is stuck in geometry. This happens in the Library Annex and the Map Chamber. Walk away from the key, fast travel out, and return. The key will respawn at its starting point rather than at its stuck position.
If a cabinet refuses to open even with the key present, the most likely cause is the proximity check, not a bug. The key has to be within a short range of the cabinet, and the player has to be within a shorter range of both, before the interaction prompt appears. Standing on a chair or a banister to look at the cabinet can break the trigger, because the game’s spatial checks assume the player is on the floor.
Why the quest is designed the way it is
The Daedalian Keys side quest is one of the clearest examples of how Hogwarts Legacy turns the castle itself into a navigation puzzle. Each key acts as a soft tutorial for a different kind of space: corridors teach you to follow, atria teach you to climb, courtyards teach you to pace, and the restricted wings teach you to read the game’s story gates. The reward is deliberately small, because the gameplay purpose is to make the player familiar with the castle’s vertical structure, which is useful for every other side quest that involves Hogwarts.
From a design standpoint, the choice to scatter exactly one key per floor is a way to ensure that no floor is ignored by players who would otherwise sprint between story beats. The randomization of the cabinet’s reward is a deliberate friction against farming, and the gating of the final cabinet behind the Room of Requirement anchors the quest to a place the player will return to throughout the game. The quest also benefits from the fact that the rest of the game’s collectible density is highest in the rooms the keys already pass through, which means a single sweep of the keys doubles as a sweep of the field guide pages in the same corridors.
The choice of the Transfiguration Classroom as the quest hub is also deliberate. It sits in the Astronomy Wing, which is the same wing where the first key is found, so the player never has to leave the wing to start the chase. The reference page on the quest’s structure confirms that the fastest path to the first key is to fast travel to the Transfiguration Classroom point, then walk up to the Astronomy Tower, which is the same path the in-game quest marker suggests when you accept the quest.
Tips for a clean first run
There is no need to over-prepare, but a few small habits make the first pass noticeably smoother. The habits below are not glitches or shortcuts; they are just the things that experienced players tend to do without thinking, because they fall out of how the quest is actually built.
- Pin each cabinet as you find it. The field guide accepts manual pins, and they survive fast travel, which means a half-finished run can be resumed from the same pin the next time you sit down.
- Walk, do not sprint. The key’s pace is built around the walking animation, and sprinting tends to push you past the cabinet trigger. The key also reacts to sudden direction changes, so a steady walk is faster than a sprint in practice.
- Use Revelio liberally. Each cabinet is highlighted by Revelio when you are in the correct room, which removes the need to look for the key first. The highlight also tells you if you are on the right floor before you commit to the chase.
- Do not chase keys across floors. If a key is on a different floor than the cabinet, the trigger is broken. Re-pin and reset rather than trying to herd the key back to its cabinet.
- Open the field guide page for the quest before you start. The page lists every cabinet in the same order as the field guide map, which is a useful cross-check when you are not sure whether you have missed one.
For players who are also working through the rest of the game’s completion list, the quest pairs well with a slow sweep of the castle’s collectibles, because the keys tend to pass through the same rooms that hold the field guide pages and the broader side content that drives completion progress. A single sweep of the keys therefore contributes to several completion categories at once, which is part of why the quest is a popular checkpoint for players who track their percentage in the field guide.
Where the quest sits in a broader playthrough
The Daedalian Keys quest is not a priority for combat, but it is a priority for completionists and for players who care about the House Token display. The cosmetic rewards are useful early in the game, when wardrobe options are limited, and they remain visually distinct enough to matter even after the late-game transmog system is unlocked. The quest also serves as a soft gate for learning the castle, which is helpful for any later side content that assumes you know how to navigate between Floo Flames without the quest marker.
If you are sequencing the run inside a larger plan, treat the quest as a second-pass activity rather than a first-pass one. Complete the main story gates that open the restricted wings, then sweep the keys in a single session. The sequence in this guide is built so that you can read it floor by floor, and the same sequence works as a checklist for a second pass after you have already opened most of the castle’s doors. The reference page on the quest lists all sixteen locations in a single index, which is a useful companion to the floor-by-floor walkthrough above if you want a flat list rather than a vertical route.
For a player who is replaying the game on a new character, the quest is also a useful way to re-learn the castle’s layout without replaying the main story, because the keys visit every major wing and the cabinets are pinned to landmarks that the main story does not return to after the first act. The House Token display in the Room of Requirement is also one of the few collection rewards that visibly changes the room’s appearance, which is a small but appreciated touch for players who spend a lot of time in the room managing the vivarium and the room’s decor.
Frequently asked questions
How many Daedalian key locations are there in total?
There are sixteen Daedalian key locations in Hogwarts Legacy, one for each of the cabinets in the House Cabinet set. The first key is found in the Astronomy Tower after you speak to Nellie Oggspire, and the remaining fifteen are scattered across the castle, with one cabinet on each floor. The quest is a side activity, not a main story beat, and the count is fixed across every version of the game.
Do I need to start the quest to find the keys?
Yes. The keys only spawn once the quest is active. If you visit a cabinet before speaking to Nellie, you will see the locked cabinet but no key. Return to the Transfiguration Classroom, start the quest, and the keys will begin to appear. The cabinets themselves are also locked until the quest is active, so the visual cue is consistent across the castle.
Can I open the cabinets in any order?
Yes. Each cabinet is independent, and the quest does not require a fixed sequence. The in-game order is a canonical progression that matches the floor plan, but the only constraint is the story gate for the restricted wings. Open them in any order you like, and the House Token will be awarded when the sixteenth cabinet is opened. The field guide will count the cabinets as you go, so you can see at a glance how many remain.
What happens if I lose a key mid-chase?
Walk away, fast travel to the nearest Floo Flame, and return. The key respawns after a short delay. Do not chase it across floors, because the key is bound to the floor of its cabinet and will despawn if the geometry changes. The respawn is local to the cabinet, so a fast travel to a different Floo Flame will not bring back a key that has despawned on a different floor.
Is the reward the same for every cabinet?
No. Each cabinet gives a random cosmetic item drawn from a small pool. The set includes robes, hats, gloves, scarves, and trinket slot items. The randomization is intentional, and there is no way to force a specific piece without reloading a save from before the cabinet was opened. The randomization also applies to the cosmetic’s colour, so two consecutive runs can produce visually different rewards from the same cabinet.
Do the keys count as missed content if I skip the side quest?
The quest is optional. If you skip it, you miss the cosmetic items, the House Token, and the experience of learning the castle’s vertical structure through the key chases. The main story is not affected, and the Room of Requirement remains accessible without the House Token. The completion percentage in the field guide will also be lower, because the cabinets are tracked as a separate collection from the field guide pages.
Are the Daedalian key locations the same on every platform?
Yes. The side quest applies to every version of the game, including the original PC, PS4, PS5, and Xbox Series X/S releases, as well as the Switch version. The cabinet positions and the quest structure are identical across platforms, and the cosmetic rewards are drawn from the same pool on each version. The only platform-specific difference is the control scheme used to mount a broom, which affects how quickly you can reach the high keys.
Does the quest reward change after the main story?
No. The reward is fixed at one random cosmetic item per cabinet and the House Token when the final cabinet is opened. Post-game content does not change the quest, and the cabinets do not reset, so the reward can only be earned once per playthrough. New-game-plus modes inherit the same quest structure, but the cosmetic rewards are redrawn from the same pool rather than upgraded.
Can two players cooperate on the same quest in multiplayer?
No. Hogwarts Legacy is a single-player game, and the Daedalian Keys quest is a personal side activity tied to the host’s quest log. There is no co-op mode in which two players can split the cabinets between them, and the quest does not track progress across multiple accounts. The House Token is awarded to the player who opens the sixteenth cabinet, not to a party.
What is the fastest way to verify that I have found every cabinet?
Open the field guide, go to the quest entry for the Daedalian Keys, and check the count. The page lists sixteen cabinets, and the counter ticks up by one each time a cabinet is opened. If the counter shows sixteen, the quest is complete and the House Token has been awarded. If the counter is lower, fast travel to the floor of the cabinet you suspect you missed and walk the room with Revelio active; the cabinet’s highlight is the fastest way to confirm its location without consulting an external checklist.